
Уроки можна створити після того, як ви додали інформацію про кількість занять, дату початку і т.д. до картки групи, вказали викладача та кімнату і натиснули на “Генерувати заняття”. Ви можете переглянути більше деталей в посібнику “Як додати уроки до групи”.
Як тільки ви додасте вищезгадані пункти, заняття з’являться на картці “Уроки”. Тут ви побачите верхню частину картки:
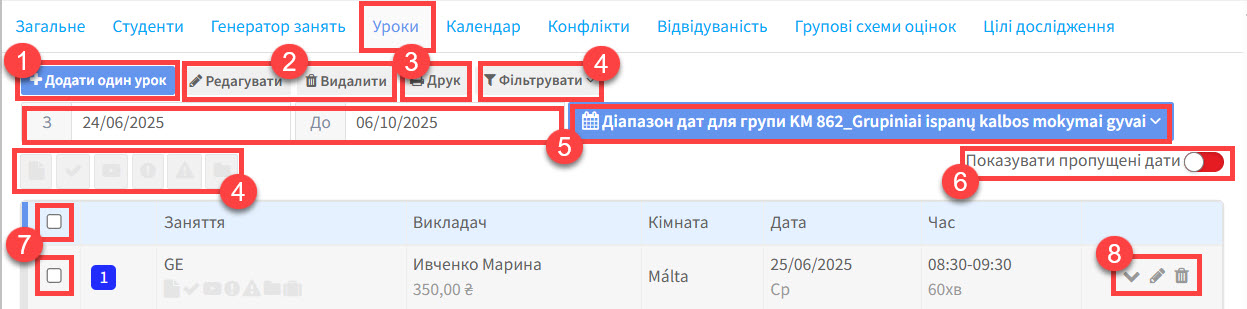
- Додати один урок: Натисканням тут, ви відкриєте картку, щоб вказати день, час і т.д. для нового уроку.
- Редагувати та Видалити: доки ви не оберете уроки для роботи (див. 7), ці пункти є неактивними. Після того як ви обрали урок для редагування, з’явиться картка уроку, щоб ви могли змінити його деталі. Якщо ви натиснете на “Видалити”, вам буде запропоновано виконати наступні дії:
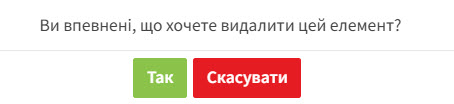
Якщо ви обираєте “Так”, з’являться ще 2 питання:

- Якщо ви обираєте “Так” на перше питання, урок буде перенесено.
- Залежно від ваших налаштувань, система може запитати чи бажаєте ви відправити повідомлення про зміну викладачам і студентам у групі. Натисніть “Так”, щоб відправити повідомлення.
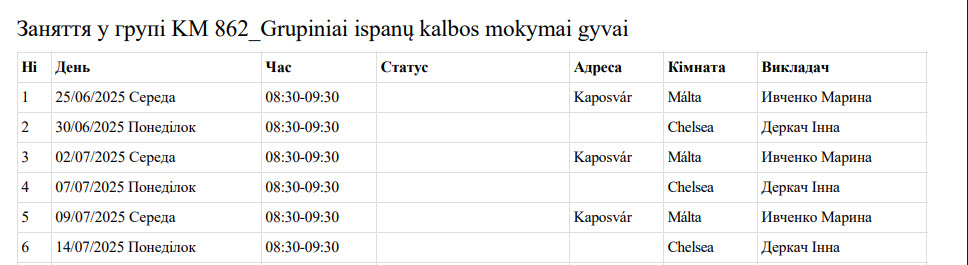
3. Роздрукувати розклад усіх запланованих уроків для групи:
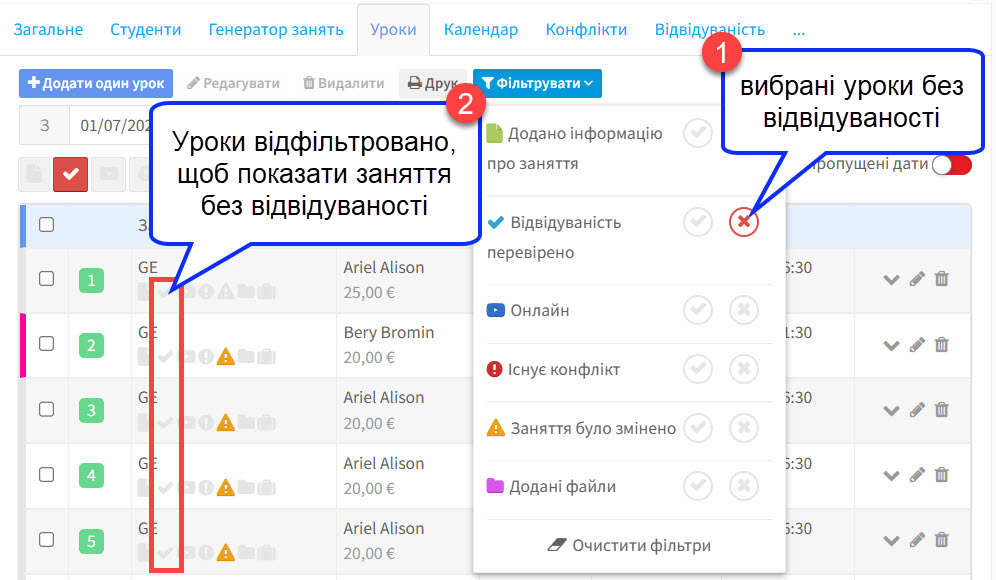
 4. Як тільки ви додали деталі та зміни до уроків, значки поруч з уроком будуть підсвічуватись. Ви можете відфільтрувати уроки за цими значками.
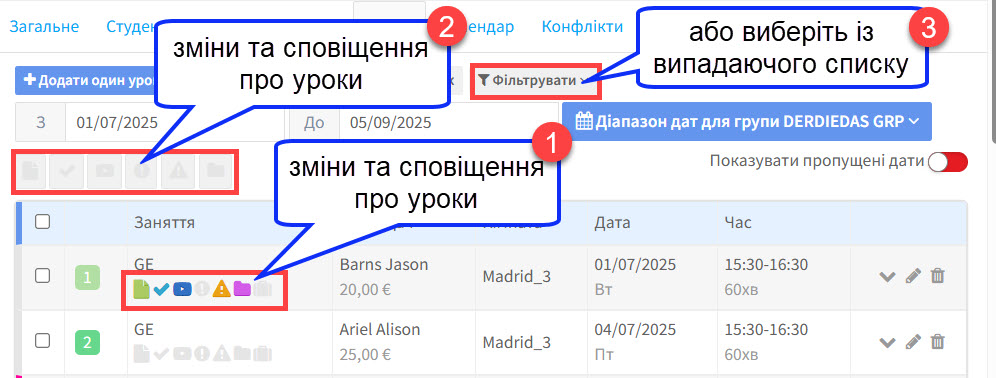
Тут можна переглянути приклад, як виглядає фільтр уроків:
5. Тут ви можете вибрати часовий проміжок для уроків, які ви хочете переглянути
6. “Пропущена дата” – це день, на який мав бути запланований урок. Тобто це не вихідний, а день, в який було вирішено не проводити урок.
7. Тут ви можете вибрати уроки, які хочете відредагувати або видалити (див. 2). Якщо ви бажаєте змінити багато уроків одночасно (можливо це заміна класної кімнати), ви можете скористатися корисним інструментом.
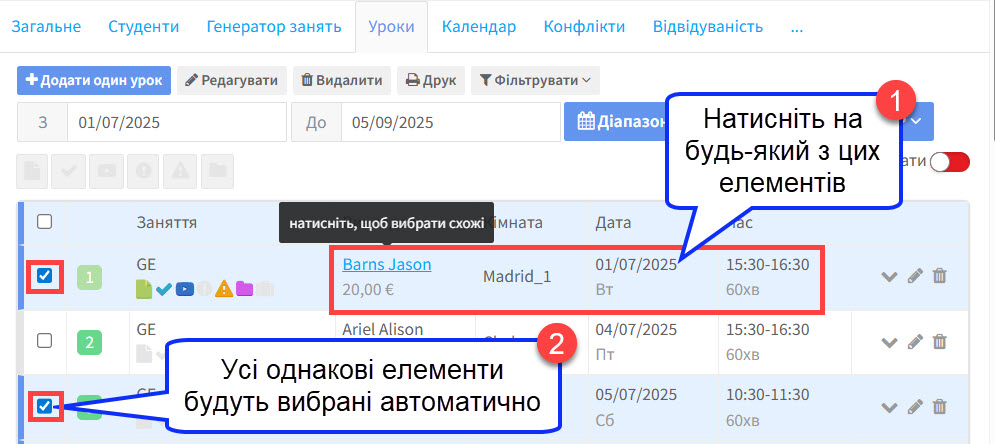
Після вибору уроків перейдіть до кнопки “Редагувати”.
8. Тут є три варіанти роботи з окремими уроками:
 Змінити статус. Якщо ви хочете занотувати щось про урок, ви можете позначити це у системі.
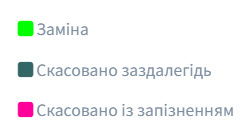
Ці кольори та пояснення показані в уроках:

Ці пункти контролюються у розділі: Адміністратор школи — Налаштування — Статуси занять.
 Редагувати заняття. З’явиться картка уроку і ви зможете змінити що завгодно.
 Видалити урок. Система запитає чи ви хочете замінити урок – див. пункт 2 вище.
Уроки, які ви створюєте і зміни, які до них застосовуєте відображені внизу картки:
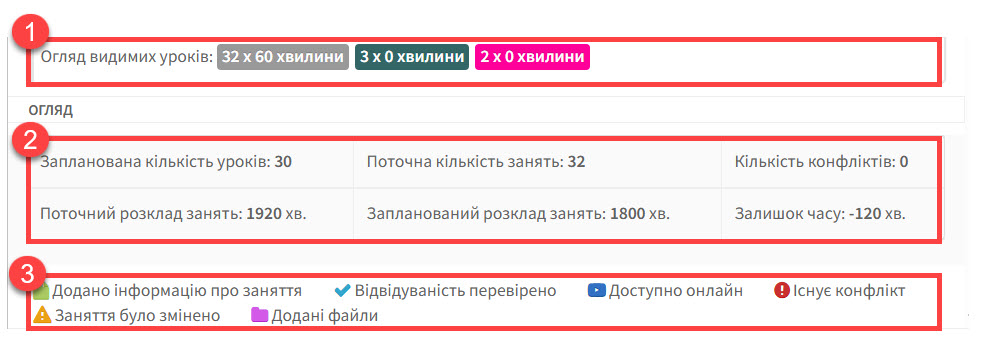
- Уроки відображаються зверху. Вони змінюватимуться залежно від введених дат.
- Розподіл запланованих та фактичних уроків, а також будь-які проблеми.
- Деталі уроків. Вони пов’язані фільтрами в пункті 4 вище.